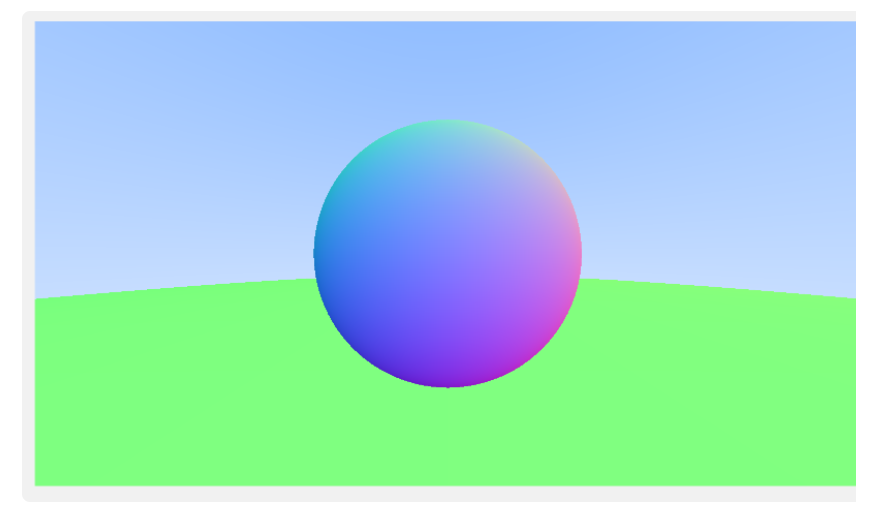
仔细观察前面生成的图片,在物体的交界处呈现的是锯齿状,哪怕分辨率非常大,比如:
1 const int image_width = 1600 ;
得到这样的图像
放大边缘,可以看到依然如此,为了解决这个问题,先看抗锯齿的本质。
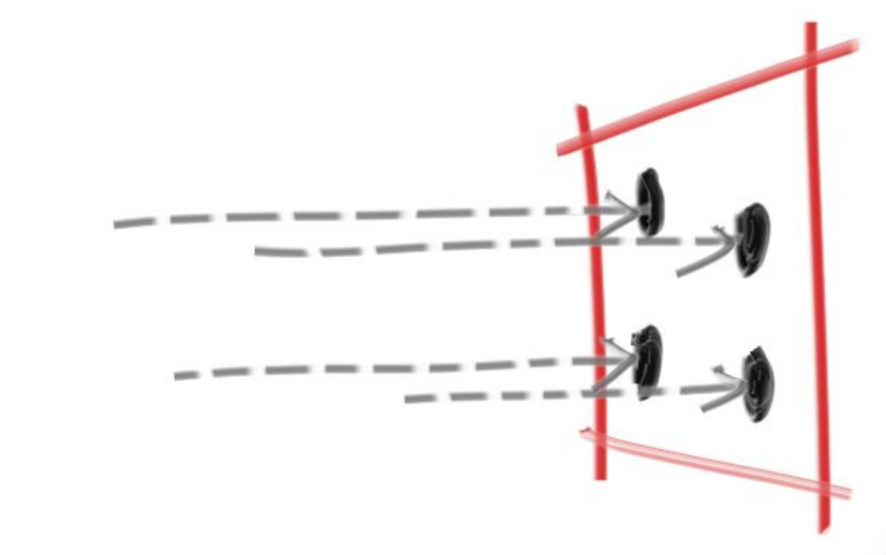
本质 其实这个问题之前讨论过,相机只对着每个像素的左上角发射光线,那左上的带回的颜色可以代表整个像素吗?当然不行,所以最好的解决办法就是在这个像素内多发射几次光线,然后取颜色的平均值,即提高采样率 。
比如上图中我们可以在一个像素内采样四次,得到的图像就会准确的多。
随机数 在这里我们就需要用到随机数,其实光线追踪的很多地方都会用到它,首先回忆一下C语言中的随机数,在rtweekend.h中加入内联函数:
1 2 3 4 5 6 7 8 9 10 11 12 #include <cstdlib> ... inline double random_double () return rand () / (RAND_MAX + 1.0 ); } inline double random_double (double min, double max) return min + (max - min) * random_double (); }
在C++中,我们有更强大的随机数算法,那就是mt19937,它的随机性好,在计算机上容易实现,占用内存较少,所以这里选用mt19937随机数,可以把上面代码中random_double函数改掉:
1 2 3 4 5 6 7 8 9 #include <random> inline double random_double () static std::uniform_real_distribution<double > distribution (0.0 , 1.0 ) static std::mt19937 generator; return distribution (generator); }
封装相机 这是一个封装我们的相机的好机会。在开始多次采样之前,我们先把相机处理完,让main函数中少一点乱七八糟的代码。
我们可以把在main函数中渲染循环外对相机的所有操作都移动到相机类的构造函数里,然后创建一个类内函数专门用来发射光线,这样设计下来,在main函数中所剩的代码最为清爽。
创建camera.h文件,写入:
1 2 3 4 5 6 7 8 9 10 11 12 13 14 15 16 17 18 19 20 21 22 23 24 25 26 27 28 29 30 31 32 33 #ifndef CAMERA_H #define CAMERA_H #include "rtweekend.h" class camera { public : camera () { auto aspect_ratio = 16.0 / 9.0 ; auto viewport_height = 2.0 ; auto viewport_width = aspect_ratio * viewport_height; auto focal_length = 1.0 ; origin = point3 (0 , 0 , 0 ); horizontal = vec3 (viewport_width, 0.0 , 0.0 ); vertical = vec3 (0.0 , viewport_height, 0.0 ); lower_left_corner = origin - horizontal/2 - vertical/2 - vec3 (0 , 0 , focal_length); } ray get_ray (double u, double v) const { return ray (origin, lower_left_corner + u*horizontal + v*vertical - origin); } private : point3 origin; point3 lower_left_corner; vec3 horizontal; vec3 vertical; }; #endif
修改颜色类 因为现在需要多次采样,原color类中的write_color函数也需要修改,为了用户更方便的使用main函数中,颜色只管叠加,其余交给write_color处理:
1
2
3
4
5
6
7
8
9
10
11
12
13
14
15
16
17
void write_color (std::ostream &out, color pixel_color, int samples_per_pixel) auto r = pixel_color.x (); auto g = pixel_color.y (); auto b = pixel_color.z (); auto scale = 1.0 / samples_per_pixel; r *= scale; g *= scale; b *= scale; out << static_cast <int >(256 * clamp (r, 0.0 , 0.999 )) << ' ' << static_cast <int >(256 * clamp (g, 0.0 , 0.999 )) << ' ' << static_cast <int >(256 * clamp (b, 0.0 , 0.999 )) << '\n' ; }
这个函数首先需要把处理传进来的颜色除以采样数,还需要将每个通道的颜色映射到0到255的范围内。其中clamp函数是为了确保传入的值在特定区间内,比如这里如果传入的值大于1,就会导致颜色无法显示。所以还是在这个文件中写入函数:
1
2
3
4
5
inline double clamp (double x, double min, double max) if (x < min) return min; if (x > max) return max; return x; }
成果验收 接下来只要替换相机,渲染循环中再加一层for即可:
1 2 3 4 5 6 7 8 9 10 11 12 13 14 15 16 17 18 19 20 21 22 23 24 25 26 27 28 29 30 31 32 33 34 35 36 37 38 39 40 41 42 43 44 45 46 47 48 #include "camera.h" ... int main () const auto aspect_ratio = 16.0 / 9.0 ; const int image_width = 400 ; const int image_height = static_cast <int >(image_width / aspect_ratio); const int samples_per_pixel = 100 ; hittable_list world; world.add (make_shared<sphere>(point3 (0 ,0 ,-1 ), 0.5 )); world.add (make_shared<sphere>(point3 (0 ,-100.5 ,-1 ), 100 )); camera cam; std::cout << "P3\n" << image_width << " " << image_height << "\n255\n" ; for (int j = image_height-1 ; j >= 0 ; --j) { std::cerr << "\rScanlines remaining: " << j << ' ' << std::flush; for (int i = 0 ; i < image_width; ++i) { color pixel_color (0 , 0 , 0 ) ; for (int s = 0 ; s < samples_per_pixel; ++s) { auto u = (i + random_double ()) / (image_width-1 ); auto v = (j + random_double ()) / (image_height-1 ); ray r = cam.get_ray (u, v); pixel_color += ray_color (r, world); } write_color (std::cout, pixel_color, samples_per_pixel); } } std::cerr << "\nDone.\n" ; }
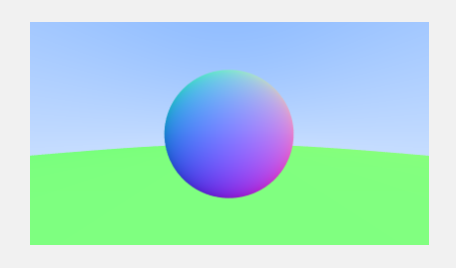
漫长等待后我们得到了一个更加“圆润”的球
强大的力量都需要代价,代价就是比原来要多花100倍的时间。但是多次采样是我们渲染效果真实感的保障,并且多次采样在后面还有着更为广泛的应用。
拓展
该场景下的抗锯齿算法是否可以优化?
我认为是可以优化的,比如我们是没有必要在非物体的边缘做100次的采样,这些地方发射一次又或是多次带回来的结果也没有什么不同,所以这里可以在一个像素内先少量采样,如果它们返回的t值不同,则说明这个像素处于物体交界处,需要多次采样来抗锯齿。也类似光栅化中的FXAA。
了解光栅化有哪些抗锯齿方法。
增加屏幕分辨率。
在采样之前进行模糊处理(滤波)处理,边界弱化以后,对应像素值起缓冲作用。
MSAA,跟本文一样检测图形覆盖面积,也是随机多次采样的方法。
FXAA,获得由锯齿的图,再后处理后去除锯齿,速度快。
TAA,在时间和空间上都采用不同的采样点取颜色混合,静态场景下,每一次采样使用像素中心添加一个随机的抖动取得,该帧结果与上一帧进行混合,动态场景下需要使用 Motion Vector 贴图来记录物体在屏幕空间中的变化距离,并使用它得到该物体片元上一帧的像素值进行混合。
参考文献 https://raytracing.github.io/books/RayTracingInOneWeekend.html
参考自《RayTracingInOneWeekend》第7节。