光线
如何将抽象的光线具体的表现出来并不困难,在初中物理的时候我们就使用一个点加上一个射线的方式来表示光线,于是我们可以用这样的公式描述它:P(t)=A+t*b
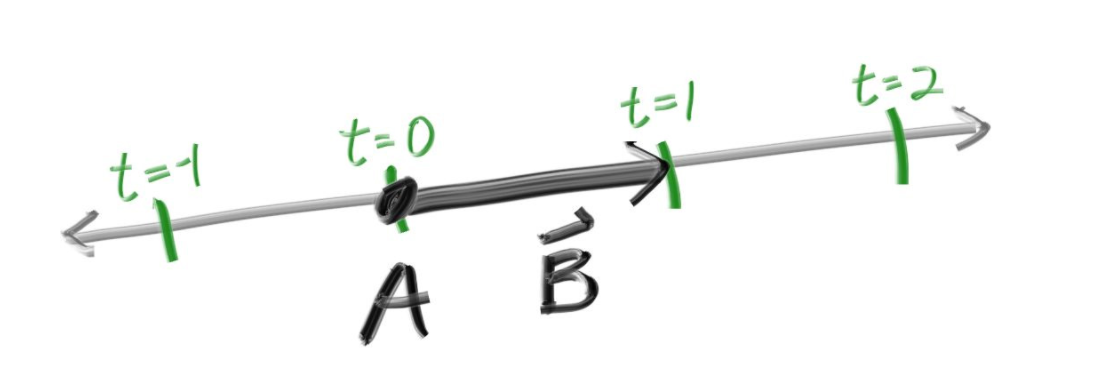
A表示光线的原点(光源位置),b为一个单位向量表示一个方向,t则表示单位时间,通过给t取不同的值,我们可以得到沿路上所有的点的三维坐标,当然,这个值一般来说不会为负数,我们新建ray.h,输入:
1
2
3
4
5
6
7
8
9
10
11
12
13
14
15
16
17
18
19
20
21
22
23
24
25
26
27
28
29
30
| #ifndef RAY_H
#define RAY_H
#include "vec3.h"
class ray {
public:
ray() {}
ray(const point3& origin, const vec3& direction)
: orig(origin), dir(direction)
{}
point3 origin() const { return orig; }
vec3 direction() const { return dir; }
point3 at(double t) const {
return orig + t * dir;
}
public:
point3 orig;
vec3 dir;
};
#endif
|
相机
我们把“相机”固定在一个位置,并且固定一下它观察的方向。
接下来需要解决两个问题:
- 光线从哪里射出呢?相机位置。按照常理来说,太阳发出的光线从物体上弹射了多次,最终会被摄像机(或者人眼)捕捉。相机位置应该是光线的终点才对啊,怎么会是起点呢?原因是我们需要逆光路取色,这是路径追踪的经典光线模型,重点是我们的光线和现实中的光线是反过来的,如果正向光路进行光线追踪会极其困难,几乎寸步难行。
- 光线朝哪个方向射出呢?这就要引出一个“虚拟视口”的概念。它就像一个相框,摆在相机的前面,相机发射的密集光铺满相框,就得到图像,具体方法为:按照行优先的顺序,从左上角开始,一排一排的射出光线,射出光线的数目就是像素的数目,换句话说,我们对每一个像素都会射出一根光线。
将相机位置定位(0,0,0)这个场景是这样的:
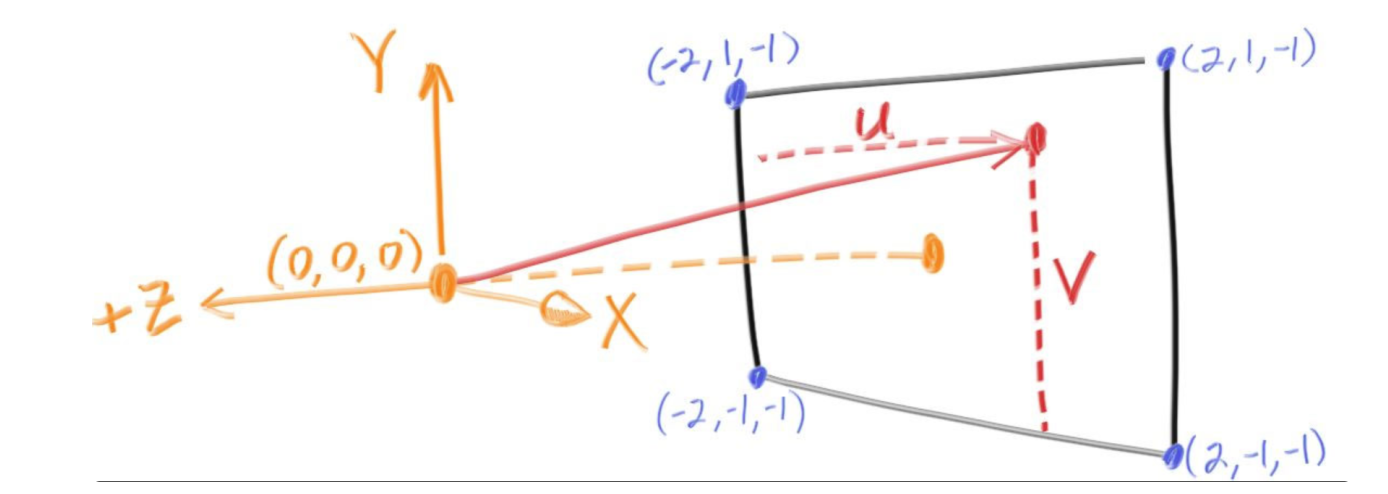
假设图中的虚拟视口上有800个像素,每个像素长宽都是0.1,最终得到一张4020的图片,我们只需要瞄准*每一个像素的中心。
按照行优先左上角开始,发生的第一根光线应该是从(0,0,0)射向(-2+0.05,1-0.05,-1)方向。不必要求这个方向向量是一个单位向量,保持方向向量是单位向量并不能给项目提供更多便利。如此类推:第二个是(-2+0.15,1-0.05,-1)方向、第四十个是(-2+3.95,1-0.05,-1)方向、第八百个是(-2+3.95,1-1.95,-1)方向。
改写main函数,并且为其所在的文件添加一个全局函数,如下:
1
2
3
4
5
6
7
8
9
10
11
12
13
14
15
16
17
18
19
20
21
22
23
24
25
26
27
28
29
30
31
32
33
34
35
36
37
38
39
40
41
42
43
44
45
46
47
48
49
50
51
52
53
54
55
56
57
58
59
60
61
62
63
64
| #include "color.h"
#include "ray.h"
#include "vec3.h"
#include <iostream>
color ray_color(const ray& r) {
vec3 unit_direction = unit_vector(r.direction());
auto t = 0.5*(unit_direction.y() + 1.0);
return (1.0-t)*color(1.0, 1.0, 1.0) + t*color(0.5, 0.7, 1.0);
}
int main() {
const auto aspect_ratio = 16.0 / 9.0;
const int image_width = 400;
const int image_height = static_cast<int>(image_width / aspect_ratio);
auto viewport_height = 2.0;
auto viewport_width = aspect_ratio * viewport_height;
auto focal_length = 1.0;
auto origin = point3(0, 0, 0);
auto horizontal = vec3(viewport_width, 0, 0);
auto vertical = vec3(0, viewport_height, 0);
auto lower_left_corner = origin - horizontal/2 - vertical/2 - vec3(0, 0, focal_length);
std::cout << "P3\n" << image_width << " " << image_height << "\n255\n";
for (int j = image_height-1; j >= 0; --j) {
std::cerr << "\rScanlines remaining: " << j << ' ' << std::flush;
for (int i = 0; i < image_width; ++i) {
auto u = double(i) / (image_width-1);
auto v = double(j) / (image_height-1);
ray r(origin, lower_left_corner + u*horizontal + v*vertical - origin);
color pixel_color = ray_color(r);
write_color(std::cout, pixel_color);
}
}
std::cerr << "\nDone.\n";
}
|
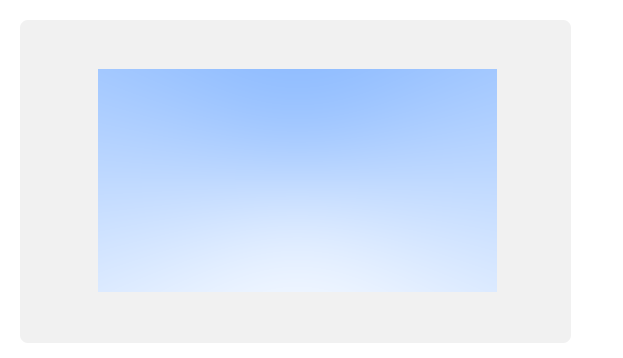
通过光线在y轴方向上的分量得到一种类似于蓝天的效果,这个图片也将在后来成为我们的背景。
拓展
1:循环渲染射出光线瞄准的是哪里呢?
仔细计算可以发现,是每个像素的左上角,并不是中心点,其实左上角又或是中心点这一点的颜色都不能代表整个像素的颜色,这个问题后续将会解决。
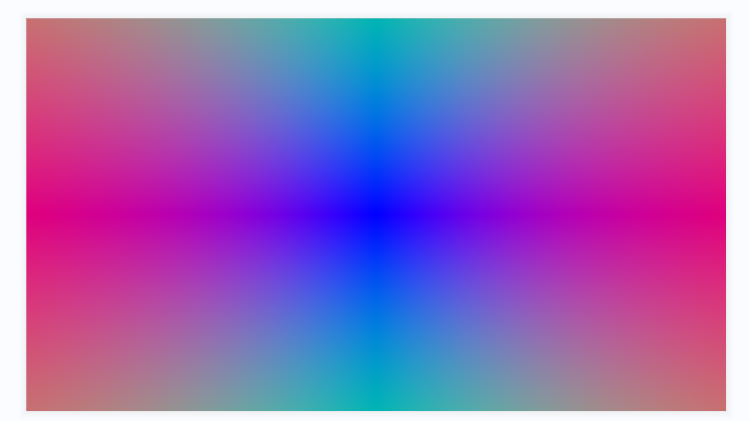
2:更改ray_color函数可以制作一些更加炫酷的背景:
1
2
3
4
5
| color ray_color(const ray& r) {
auto vec = r.direction() * 1 - r.origin();
auto absVec = vec3(std::abs(vec.x()), std::abs(vec.y()), std::abs(vec.z()));
return unit_vector(absVec);
}
|
参考文献
https://raytracing.github.io/books/RayTracingInOneWeekend.html
参考自《RayTracingInOneWeekend》第4节